
Help & Setup
Connect a scale and take good temperatures
Step-by-step setup for weight capture in IMPD, what’s coming for Bluetooth, and good practice for melt and mold temperatures.
Weighing scale
Hardware needed
IMPD reads a scale over USB-serial (RS-232) or over Bluetooth. Pick your setup, then follow the matching guide.
A Bluetooth scale
A scale with Bluetooth serial output built in.
RS-232 scale + Bluetooth serial module
A standard scale with an RS-232 serial port, plus a Bluetooth serial module such as the SH-B30.
Plan note
Bluetooth requires a Pro or Medical license. Basic is USB only.
Weighing scale · Bluetooth
1. Hardware you need
01
Scale with RS-232
A balance with an RS-232 (serial) DB9 port, or a scale with Bluetooth built in.
02
SH-B30 Bluetooth module
Plug the SH-B30 straight into the scale’s RS-232 DB9 port, with no cable. Its USB lead is power only.
03
Android tablet
Running IMPD with a Pro or Medical license. No OTG or USB-serial adapter is needed.
Scale and adapter settings
2. Match the scale and the adapter
The scale and the adapter must use identical serial settings. The adapter defaults to 9600 8N1, and it’s set on the adapter, not the tablet.
Baud rate
9600 on the scale and the adapter.
Data bits
8
Parity
None
Stop bits
1
Flow control
None
Serial output
On the scale, turn serial output on (continuous or print).
Pairing PIN
1234
Output mode (IMPD)
Continuous, On request (the app asks for a reading, or press Print) or On stable.
Set on the adapter, not the tablet
Make the adapter’s serial settings match the scale’s. The tablet only pairs with the adapter; the baud rate and data format live on the scale and the adapter.
In the app
3. Pair and set up in IMPD
- Pair the adapter in Android Bluetooth settings, PIN 1234. There’s no need to tap connect, because the app opens the link itself.
- In IMPD, go to Settings › Scale › Connection, choose Bluetooth SPP adapter, and pick the paired adapter.
- Choose an Output mode: Continuous, On request (the app asks for a reading, or press Print) or On stable.
- Tap Test connection, then put a weight on the scale or press Print. The weight should show, converted to grams.
Plan note
Bluetooth requires a Pro or Medical license. Basic is USB only.
Capture
4. Capture weight from the keypad
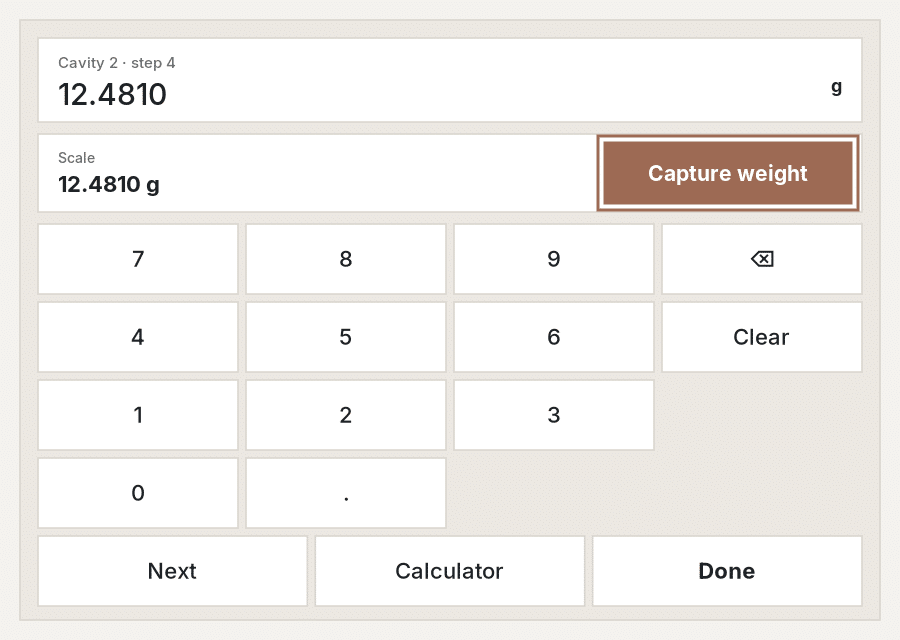
- Capture weights from the keypad’s Scale bar.
- Tap Capture weight. The reading goes into the cell you are editing.
Troubleshooting
5. If it doesn’t work
Connects, but no reading
Check the scale’s baud rate, output mode, and that serial output is on.
Won’t connect
Check the adapter’s power and pairing.
No scale
Type the weight by hand.
Weighing scale · RS-232 serial
1. Hardware you need
01
Scale with RS-232
A balance with an RS-232 (serial) output, built in or as an interface kit. See Recommended Equipment.
02
USB-serial adapter
An RS-232 to USB adapter. IMPD supports common chipsets: FTDI, Prolific (PL2303), CH34x and Silicon Labs CP210x. Use a straight-through or null-modem cable as your scale’s manual specifies.
03
USB-C OTG adapter
Plugs the USB-serial adapter into the tablet’s USB-C port. The tablet must support USB host (OTG).
Scale settings
2. Match the scale and the app
The values on the scale and in IMPD must be identical. Many scales ship at 9600 baud, 8 data bits, no parity, 1 stop bit, but check the scale’s manual or menu.
Baud rate
1200, 2400, 4800, 9600, 19200, 38400, 57600 or 115200. Default 9600.
Data bits
7 or 8. Default 8.
Parity
None, Odd or Even. Default None.
Stop bits
1, 1.5 or 2. Default 1.
Output format
Continuous (the scale streams readings) or On request (IMPD sends a request command; default P\r\n). Set the same mode on the scale (often called continuous / stream vs print on demand).
Parse regex
How IMPD finds the number and unit in the scale’s text line. The default reads a number followed by an optional g, kg, lb or oz. Most scales work without changing it.
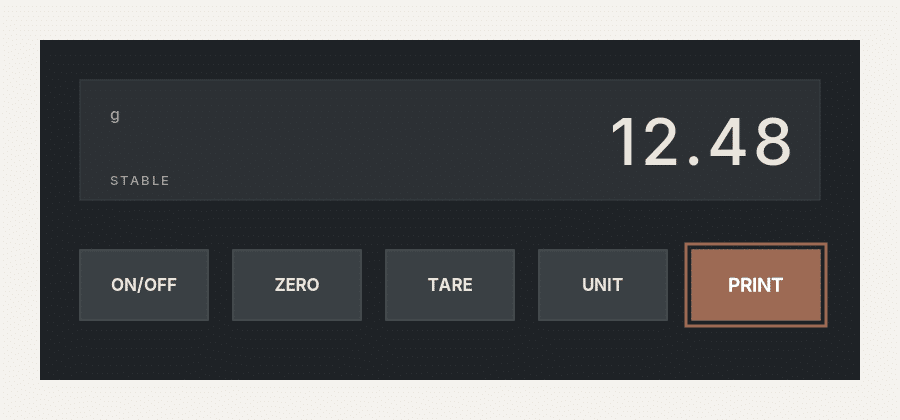
The PRINT key on the scale
With On request, IMPD asks the scale for a reading and you never touch the scale’s keys. With Continuous off, many scales send one reading only when you press their PRINT key; Continuous or On request is easier at the press.
In the app
3. Settings in IMPD
- Open Settings › Scale.
- Set Connection to USB-serial.
- Set Baud rate, Data bits, Parity, Stop bits and Output format to match the scale. For On request, enter the scale’s Request command.
- Plug in the adapter. The first time, Android asks to allow USB access: tap Allow. The reading continues automatically.
- Tap Test reading and place a known weight on the pan to confirm.
Weight units
In Settings › Units & display › Weight units, choose Grams (g), Ounces (oz) or Pounds (lb). Weights are stored and shown with 4 decimals. Switching converts every saved weight. Scale readings in g, kg, lb or oz are converted to the unit you choose.
Capture
4. Capture weight from the keypad
- Tap any weight field in a study (Gate Freeze, Check Ring Repeatability, Cavity Balance, DOE and others). The numeric keypad opens with a Scale bar.
- The live reading appears in the Scale bar when the scale answers.
- Tap Capture weight. The reading goes into the exact cell you are editing, converted to your weight unit.
- No scale? Type the weight by hand. That always works.
Troubleshooting
5. If it doesn’t work
No reading / “No data received”
Check the cable and adapter, the baud rate, and that the scale is set to Continuous or answers the request command. “No USB-serial adapter found” means the tablet doesn’t see the adapter: try another OTG adapter or check that the tablet supports USB host.
Garbled characters / “Could not parse weight”
Almost always a baud, data bits or parity mismatch. Set both sides to the same values (for example 9600, 8, None, 1) and test again.
Unstable or jumping readings
Wait for the scale’s stable indicator, shield it from drafts and vibration (a draft shield helps on 0.001 g balances), level it, and let parts cool to a consistent temperature before weighing.
“USB access was not granted”
Unplug and replug the adapter, then tap Allow when Android asks.
Coming in a later build
Bluetooth pyrometers
Planned, not yet available. Timelines are targets and may change.
Planned
Bluetooth pyrometer
Settings › Pyrometer shows the ETI ThermaQ Blue (Bluetooth LE, 2 × type K) as a placeholder. Pair pyrometer is not active yet; enter melt and mold temperatures by hand.
Planned
Pairing steps (preview)
General outline once released: turn the device on, enable Bluetooth on the tablet, open the device’s section in IMPD Settings, tap Pair, and confirm with a test reading. Final steps will be published with the release.
Good practice
Taking melt and mold temperatures
- Melt temperature: preheat the needle probe (many processors preheat it to near the expected melt temperature) so it doesn’t pull heat from the sample.
- Take an air shot or purge into an insulated container or onto an insulated surface, insert the probe right away, and stir gently until the reading peaks. Record the peak.
- Follow your company’s safety rules: hot purge can burn and spatter. Wear gloves, face protection and sleeves.
- Mold temperature: use a surface probe on the steel with the mold open, at several locations on each half (near the gate, at the end of fill, and across cavities). Measure soon after opening, at the same point in the cycle each time.
- IR thermometers are quick but depend on emissivity: shiny steel and some resins read wrong. Use contact probes for values you record in a study.
General industry practice. Always follow your material supplier’s and your company’s procedures.
Today
Entering temperatures in IMPD
Today, type pyrometer readings into the study by hand (for example melt temp in Screw Recovery). Bluetooth capture is planned.
Still stuck?
Send us your scale model and a photo of its communication settings.
Android tablets
Coming soon on Google Play
Enter the job once, run the studies you need, and leave with one clean PDF report.